How to Get Free SSL (HTTPS) with Github Pages
Published 27 December 2018 in websites
I have really been feeling the urge to write for the past month while I have been working full time rebuilding my website from scratch to host on Github Pages for free. Once I attached my custom domain to this new site, I worried about not being able to take advantage now of the free SSL I got on Namecheap.com from my purchase of one year of hosting on their servers. Lo and behold, I didn't need to worry because it turns out I can get free SSL on top of my free hosting with Github Pages, and in this blog post I will show you how to do it.
Step 1: Change your A Records or Add New Ones
I covered in my other tutorial about how to add custom domains to Github Pages how easy the process really is. In order to get SSL to work on your website, all you have to do is add or change some IP addresses in your Github Pages A records. On Namecheap, go to your dashboard and click on the button that says “Manage” next to your domain name you want to use for your Github Pages site. In the “Domain” tab of this page, make sure that the Nameservers are set to Namecheap BasicDNS in order to point the apex domain or www. domain to your Github Pages site from Namecheap. Next, in the “Advanced DNS” tab of this page, add a new A record or change an old A record that has any of the following four IP addresses. You can use any or all of these IP addresses for your A records:
- 185.199.108.153
- 185.199.109.153
- 185.199.110.153
- 185.199.111.153
Make sure your CNAME record has a host of “www” and a value of “yourusername.github.io.” with yourusername being your Github username. To use a custom subdomain, use whatever word you want to use for your subdomain as a host instead of “www”.

My own Namecheap configuration
Step 2: Enforce HTTPS in Your Github Pages Site Settings
Next, go to your repo Settings and scross down to the section labeled “Github Pages”. After you save your custom domain, you should be able to click on the checkbox that says “Enforce HTTPS” if you set up your CNAME and A record(s) successfully. Note that your site may have issues unless you make sure to add “www.” in front of your custom domain. This was what I had to do.
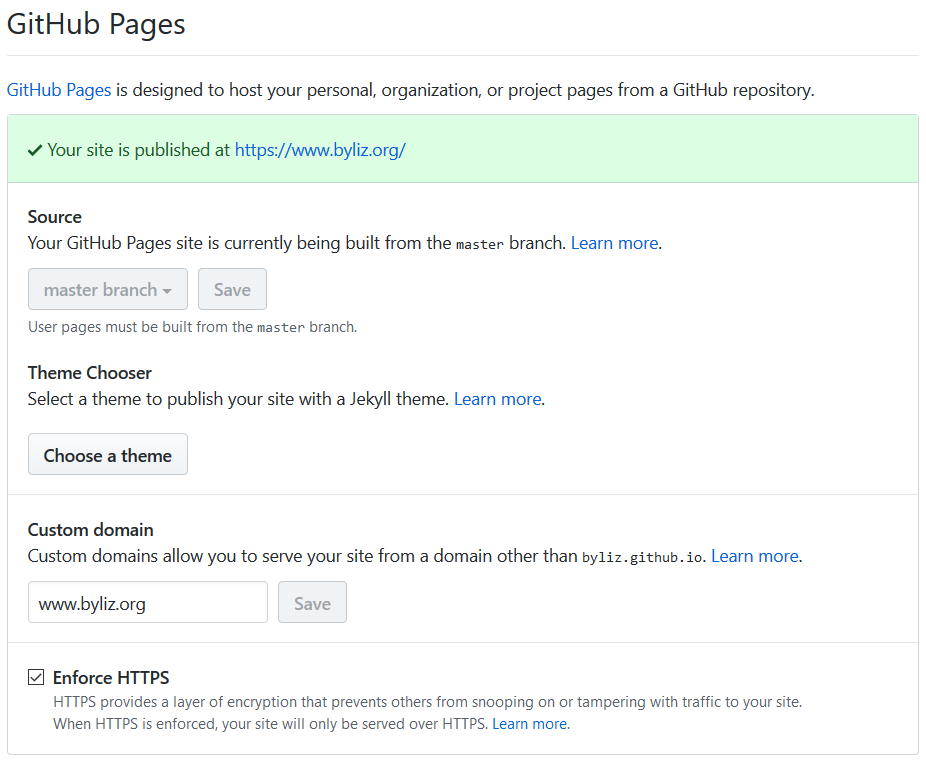
This is what you should see after a few minutes if it was a success.
Step 3: Clean Up Your Mixed Content
One issue I encountered was that for a few hours the connection to my site was marked as “insecure” by my browser. Knowing that this warning is often thrown if my site has mixed content (sources from an unsecure HTTP url such as images) I went ahead and made sure the images on my site were all from HTTPS. Note that it takes a few hours for the connection to become secured.
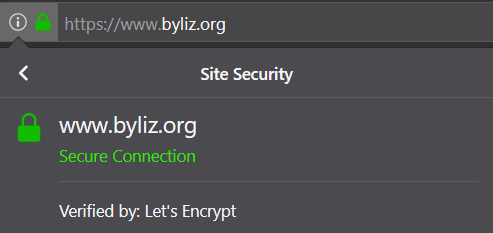
The final result, verified by Let's Encrypt.
Your new SSL is thanks to Let’s Encrypt, a “free, automated, and open Certificate Authority” as a Linux Foundation Collaborative Project. Neat stuff.
References
- “Setting up an apex domain” on Github Help
- “How to Connect a Custom Domain or Subdomain to your Site For Free Using Namecheap”
- Let’sEncrypt.org, providers of the free SSL
- Github Pages
- Namecheap.com

I'm Liz, the front-end web developer who made this static blog. My writings on here cover art, programming, and working on the Web, but I no longer regularly update this website. Check out my developer portfolio.